Woodworking – Moisture Content

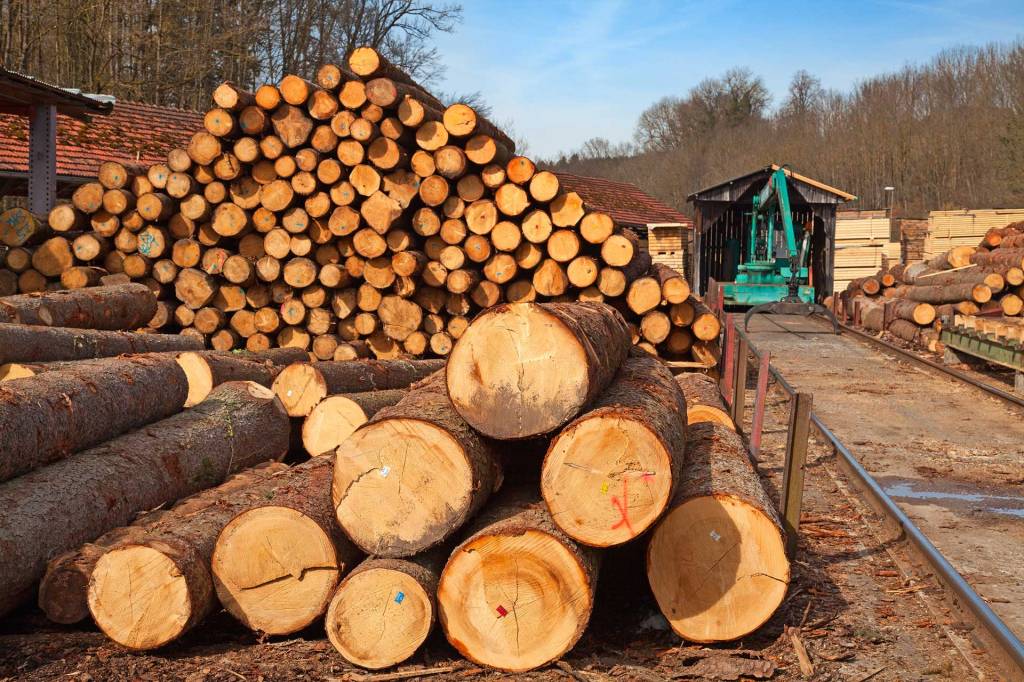
Have you ever tried to build a campfire using logs from a freshly cut down tree? It doesn’t work very well does it? But if you build a campfire from logs from a tree that had been cut down a couple years before, it burns easily. You may also notice that the log from the freshly cut tree is a lot heavier then the log that was cut a couple years ago. That’s because a tree draws moisture from the ground in order to live. When you cut it down, that moisture is still trapped within the wood, but over time it evaporates out. So a log from a freshly cut tree will weigh more than one that’s been down for a while because of the weight of the water.

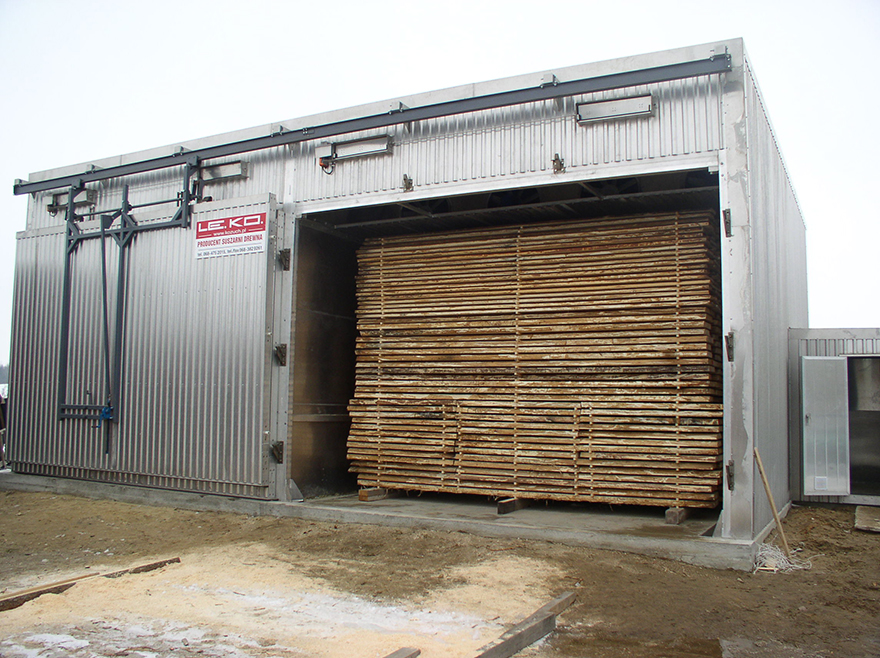
So why’s this important? Well, we know that the wood is going to dry over time. As it drys, its shape changes and it can even start to twist, bow, and even crack. We don’t want to start working with it only to have it twist or crack on us, so we wait until the wood is dry before working with it. This may take a couple years to dry to the point that we can start working with it, so lumber yards will use Wood Kilns to dry the wood faster. Figure 1 shows an industrial wood kiln. A wood kiln circulates hot air around the boards in order to dry them quicker. Notice that the boards are stacked on top of each other with a space between them. That way all the board’s surfaces are exposed to the circulating hot air allowing the board to dry quicker as well as dry evenly.

Figure 1: Industrial Wood Kiln.

The lumber yard doesn’t completely dry the board. There’s still some moisture left in the wood. We call this the wood’s moisture content. This is a percentage of the amount of moisture left in the board. This is calculated as the weight before drying minus the weight after drying divided by the weight after drying, then multiplying that times 100 in order to get a percent as follows :

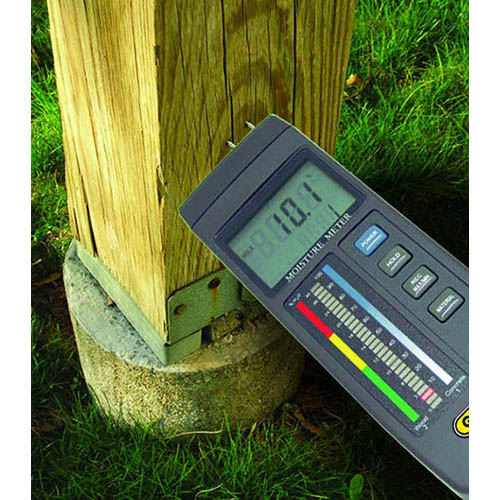
Didn’t know we were going to have to do math did you? Well you really don’t. We use moisture meters to determine the wood’s moisture content. Figure 2 shows a Pin Style Moisture Meter. It has two pins that you press against the grain of the board. Figure 3 shows a Contactless Moisture Meter. All you have to do with this style is lay it on the board.

Figure 2: Pin Style Moisture Meter
Figure 3: Contactless Moisture Meter

Normally wood that you purchase from a lumber yard will have a moisture content between 7%-19%. Woods for interior projects you’ll want between 6%-8% moisture content and exterior projects are usually 9%-15% moisture content. Why’s this important? The lumber will absorb or evaporate moisture depending on the humidity of the environment that it’s in. Indoors the humidity is relatively low and pretty consistent. Outdoors the humidity can vary and in many cases it can be high. Depending on the humidity the wood will reach moisture content equilibrium, or a point at which it will no longer gain or loose moisture. Woodworkers use the term acclimate. You want to acclimate your wood for the environment that it’s going to be in before starting to work with it. Meaning that you’ll let it adjust to that environment (humidity level). Otherwise the wood could twist or crack once you move it into its intended environment. If you’re working on a project that’s going to remain indoors, you’ll want to work on it in a shop with a controlled environment. Meaning that the shops temperature and humidity is roughly the same as that of a normal house.

In some cases, like with music instruments, we’ll want an even lower moisture content (5%-6%), so they’ll have a small kiln in the shop. Once the wood is at the level of moisture they want, they’ll start woodworking it. Many times they’ll seal it afterwards in order to maintain the wood at that level of moisture content.

So, prior to starting your next woodworking project, you’ll want to know what environment you plan on using it in (indoors vs outdoors). Then establish the required moisture content you’ll need your wood at. This will save you the headache of having your project twist and crack on you.

Woodworking Tools – Jointer

In order to do woodworking, we need some wood, some lumber. I’m sure you’ve probably figured out by now that the lumber we purchase from Chelsea Lumber or any store comes from trees. The trees are harvested and brought to a lumber yard where they will be cut into boards. Figure 1 shows logs that have been cut to length and ready to be cut length wise into boards on a saw mill.

Figure 1: Piles of logs at the lumber yard waiting to be cut into boards.

Figure 2 shows a log being cut on a sawmill. The lines drawn on the end of the log shows how the log will be cut. The pattern on the end will change depending on the size of board and type of cut that you want.

Figure 2: Log being cut on a sawmill.

Depending on the orientation of how you cut the board you’ll get a different type of wood cuts. There are four typical types of wood cuts as shown in Figure 3: Plain Sawn, Quarter Sawn, Rift Sawn, and Live Sawn. As you can see in Figure 3, the grain appearance will change depending on the type of wood cut. Notice Quarter and Rift Sawn are similar. The difference is in the angle between the cut and the grain. The angle for Quarter Sawn is between 60 and 90 degrees, where the angle for Rift Sawn is between 30 and 60 degrees.

Figure 3: Different types of wood cuts.

Figure 4 shows a stack of lumber similar to the lumber that you’d buy at a lumber yard. So you purchase some lumber and bring it to your wood shop to start making your project. However the wood is rough and it may be twisted and cupped. We need to smooth and flatten all four sides of the board. This is called S4S, surface four sides. We start this process off using a Wood Jointer to smooth and flatten two sides and in the process making them perpendicular to each other. Which means that they are square or form a 90 degree angle with each other.

Figure 4: Cut lumber like you’d find at the lumber yard.

Nate Harris, the owner of Harris Design, will demonstrate how to use a Wood Jointer in this short video.

Nate Harris demonstrating the use of a wood jointer.

You may be wondering why it’s called a jointer. The jointer creates smooth flat surfaces, which is necessary for jointing two pieces of wood together by gluing or bonding them. This is necessary to make larger boards. If you look at your kitchen table, it’s far too big to be just one board. It’s made up of multiple boards glued together. Figure 5 is an example of three boards glued together. The jointer makes the surfaces smooth and flat to ensure that there will be a good bond between the mating surfaces.

Figure 5: Example of three boards glued together.

In conclusion, we use the Wood Jointer to smooth and flatten the side and edge of the board, which covers two of the four sides (S4S). Next time we’ll cover the Wood Planer, which will work the third side.

The Golden Circle

The Golden Circle

We had our first team meeting for the Teen Building Workshop this past Saturday. We had a great time getting to know each other and took some time looking at some of the living conditions of people that are in need of help. We also started on creating our Vision Statement by looking at companies, organizations, and people that succeed when they seem to be going against the grain of the normal approach to doing things. We used the Golden Circle approach to look at the differences in how these companies and people communicate compared to how we normally communicate. These companies and people speak to the “Why” they’re doing what they’re doing. It’s what they believe in, which reaches the parts of our brain that controls our behavior, loyalty, and decision making. As apposed to the way we normally communicate which speaks to the “What” we’re doing, and talks to the part of the brain that’s responsible for rational and analytical thought.

Why is Apple Computers so innovative year after year? It’s not WHAT they do. They make computers. Dell and HP make computers too.

It’s not HOW they do it.Their products are beautifully designed and easy to use. Other’s have beautifully designed and easy to use products.

It’s WHY they do it. “We believe in challenging the status quo and doing this differently”.

They tell us “Why” they’re doing what they’re doing. And it’s not just for us, it’s for themselves. They create a culture who’s bought into this purpose of challenging the status quo and doing it differently. And because they’ve bought into this purpose, they work at it thru blood, sweat, and tears to make it happen. And because of their belief in their purpose, and they communicate that belief to us, we buy into it. Which is the reason we feel comfortable buying an MP3 player, or a Phone, or a TV from them, when they’re a computer company. Other computer companies have tried to sell products other then computers like PDAs or TVs and they’ve failed, even though they’re fully qualified to make these products. As a consumer we never bought into “Why” they were doing it.

A Vision Statement focuses on the future and the “Why” we’re doing what we’re doing. So this was a good spring board for jumping into creating our Vision Statement, which we’ll do at our next meeting.

Introduction

We’re starting a new teen group called the Teen Building Workshop. This is a group whose vision is to design and build solutions that will aid those in need. Those are just my words, we’ll need to put a vision statement together when we start meeting. So you may be thinking, sounds great, but I don’t know how to design or build solutions. No problem, we’ll learn that along the way. Actually here’s some of the things we’ll spend time on:
• Engineering Design Process
• Teamwork
• Computer Aided Design (3D CAD using Solidworks)
• Habits (self mastery & teamwork)
• How things work
• Time management
• Fundraising
• Finance
• Woodworking & Shop Practices
• Marketing
• Others needs – where we can help and serve

This will be a fun group with team building games, learning, building, and serving! Open to 6th thru 12th graders.

We’ll meet every other Saturday morning at Our Savior Lutheran Church, from 9:00 to 11:00am. Our first meeting will be March 7th. When we start producing parts and learning shop practices we’ll meet at my shop.

Our first project is to design a collapsible school desk like the image below. There’s a lot of places were school is a single room used for many different things including sleeping. So a desk that collapses and stows away will be very useful. We’ll team up with organizations like Project 418 and Love Like You Mean It, to find those in need. Once we’ve identified those in need and designed the desks they need, we’ll raise money to build them and ship the desks to them.

So if you’re interested in design, building, and helping others, come join us as we learn, grow, and serve!

If you need service hours for your class, this is a great opportunity.

If you have any questions please contact me.

Paul Hedding
phedding@heddingaerospace.com
Our Savior Lutheran Church
1515 S. Main St.
Chelsea, MI 48118